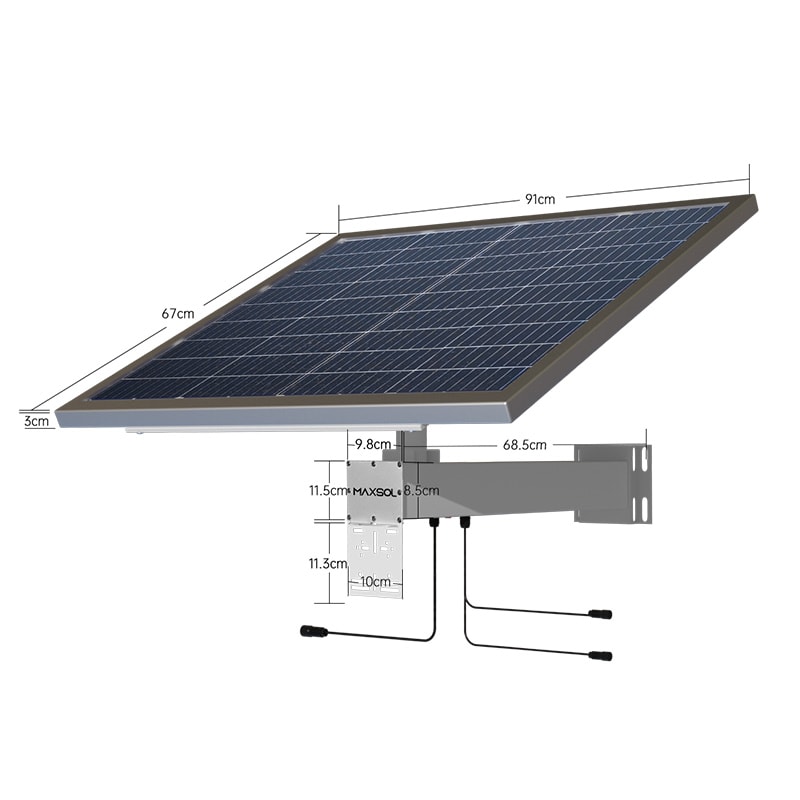
How to Choose Solar Power for Outdoor Security Cameras
Compare camera loads, solar access, battery autonomy, site protection and lifecycle cost to specify an outdoor CCTV solar power system.
By Maxsol Team

Choosing a solar power system for outdoor security cameras starts with the complete site load, not the camera count or panel wattage alone. Identify every device that must run continuously, confirm its voltage and electrical interface, assess year-round solar access, and then select enough battery autonomy for the site’s risk level.
An integrated solar kit can simplify procurement and installation, while separately specified panels, batteries, controllers and power-conversion equipment offer more flexibility. Neither approach is automatically better: the right choice is the one whose documented electrical limits, environmental protection and expansion capacity match the camera installation.
1. Match the camera load and electrical interfaces
The first factor is the complete electrical load. Include cameras, infrared illumination, radios, routers, recording equipment, PoE injectors, DC converters, heaters, cooling fans and any other equipment powered by the solar system.
Do not size a system from a camera’s headline wattage alone. Camera consumption can change when infrared LEDs, motorised lenses, onboard analytics or other functions operate. Wireless bridges and networking devices may also have start-up peaks or variable consumption.
For each device, record:
- Quantity
- Nominal and maximum power consumption
- Operating voltage
- AC, direct DC or PoE input
- Hours of operation per day
- Day and night operating differences
- Start-up or peak demand
- Required ports and connectors
- Cable length and expected voltage drop
Confirm how power reaches each camera
A solar system with DC12V outputs is not automatically compatible with a PoE camera. A separate DC-to-PoE injector, PoE switch or voltage converter may be required. Its own power consumption and conversion losses must form part of the system load.
Similarly, a 12V camera installed far from the enclosure may receive less than its required voltage because of cable resistance. Longer cable runs can require larger conductors, a higher distribution voltage with point-of-load conversion, or a different equipment layout.
Before selecting equipment, confirm:
- The output voltage range under normal operation.
- The maximum continuous and peak current per output.
- Whether outputs are individually protected.
- The polarity and connector format.
- Whether PoE follows the standard required by the camera.
- Whether converters and injectors can tolerate the battery system’s actual voltage range.
- Whether the controller can support the combined load while charging the battery.
A full energy calculation is important, but it does not need to be recreated during every product comparison. Use the detailed guide to sizing an off-grid solar power system for CCTV once the connected load and operating profile are known.
Integrated system or separate components?
| Selection approach | Main advantage | Main limitation | Best suited to |
|---|---|---|---|
| Integrated solar system | Fewer components to source and coordinate | Available outputs or controller limits may not match every camera design | Repeatable sites with known loads and interfaces |
| Separately specified components | Greater control over panel, battery, controller and distribution design | More engineering, compatibility checks and installation work | Complex, unusual or expandable surveillance sites |
| Integrated system with external networking equipment | Balances packaged power with flexible communications | Converters, switches and radios still need careful load calculations | Remote CCTV using PoE or wireless backhaul |
Treat any packaged system as a power platform rather than a tested camera bundle unless compatibility is explicitly documented.
2. Assess seasonal solar access and shading
A panel must receive adequate sunlight during the site’s least favourable operating period, not only when the installation is surveyed. In South Africa, a north-facing panel will generally offer better annual solar exposure, but the correct tilt, orientation and mounting position remain site-specific.
Survey the full solar window and look for shading from:
- Trees and seasonal vegetation
- Buildings, parapets and roofs
- Camera poles, antenna masts and fencing
- Signage and nearby structures
- Future construction
- Dust, bird fouling or wind-blown debris
- Terrain that blocks early or late sunlight
Even partial shading can reduce available charging energy. A panel position that looks clear at midday may be shaded in the morning or afternoon, while winter sun angles can expose obstructions that were not significant during a summer survey.
Separate the solar and camera viewpoints
The best position for a camera is not necessarily the best position for a panel. A camera may need a precise field of view, while the panel needs clear solar exposure and a practical orientation. Forcing both onto the same small bracket can compromise surveillance coverage or energy production.
Where appropriate, mount the panel separately and account for:
- Cable length between panel and controller
- Voltage drop
- Correct cable size
- Connector and gland protection
- Mechanical support
- Lightning and surge exposure
- Access for inspection and cleaning
- The controller’s permitted PV voltage, current and power
Do not increase panel capacity without checking the controller limits. The current datasheet and supplied configuration should be verified for maximum photovoltaic voltage, current and power.
Design for the difficult season
Avoid choosing a panel based only on an annual average or an ideal clear-sky day. The system must cope with the combination of seasonal solar conditions, local shading, dirt and the site’s actual operating load.
For example, as a hypothetical design assumption, a camera site may receive less charging energy during several overcast days while infrared illumination increases night-time consumption. This is not measured performance for any product, but it demonstrates why panel and battery selection must consider coinciding poor generation and higher load.
If shading cannot be removed, possible design responses include relocating the panel, increasing solar collection within the controller’s limits, reducing the load, adjusting the equipment schedule where security requirements permit, or selecting another power architecture.
3. Set realistic autonomy and battery requirements
Battery capacity determines how long the installation can continue operating when solar generation is inadequate, but nominal watt-hours do not equal usable delivered energy. Controller settings, conversion losses, discharge limits, temperature, battery protection and equipment voltage requirements all affect practical autonomy.
Define autonomy according to the consequences of an outage. A low-risk monitoring point may accept a shorter reserve than a critical perimeter camera or communications relay. Procurement documents should state the required design autonomy and the assumptions behind it rather than asking only for “a large battery”.
Compare capacity against the actual load
As selection references, Maxsol documents three LiFePO4-based configurations:
| System example | Documented panel configuration | Nominal battery | Documented DC outputs | Selection context |
|---|---|---|---|---|
| CS8040 80W and 576Wh solar system | 80W monocrystalline panel | 12.8V 45Ah, 576Wh LiFePO4 | Three DC12V outputs | A lower-capacity reference for modest documented loads |
| CS12060 120W and 768Wh solar system | 120W monocrystalline panel | 12.8V 60Ah, 768Wh LiFePO4 | Three DC12V outputs | A mid-range reference where the load and solar assessment support it |
| CS400150 400W and 1920Wh solar system | Two 200W panels, 400W total | 12.8V 150Ah, 1920Wh LiFePO4 | Four DC12V outputs | A higher-capacity reference for larger documented loads or reserve requirements |
All three document MPPT control. RS485 is listed as optional for the CS8040 and CS12060. These systems are selection examples, not tested compatible bundles, and the table does not establish runtime for a particular camera configuration.
A nominally larger battery does not by itself guarantee better performance. If the panel cannot replenish the energy used, the battery can enter a repeated energy deficit. Conversely, adding panel capacity without confirming controller limits can create an incompatible design.
LiFePO4 can be relevant to remote CCTV because of its electrical and storage characteristics, but battery chemistry does not remove the need for correct protection and charging control. The overview of LiFePO4 battery benefits for solar CCTV explains the selection considerations without assuming a universal service life or runtime.
Verify battery operating conditions
Confirm the following with the current technical documentation:
- Permitted charging and discharging temperature ranges
- Low-voltage disconnect settings
- Overcurrent and short-circuit protection
- Battery management and controller coordination
- Available monitoring or communications interfaces
- Recovery behaviour after a low-voltage shutdown
- Whether replacement requires proprietary parts or procedures
- Safe isolation and maintenance steps
There is no universal 24/7 guarantee based only on panel watts and nominal battery watt-hours. Runtime must be assessed against the actual load, available solar energy, reserve policy and system losses.
4. Plan installation protection and maintenance
An outdoor solar camera system must protect both electrical performance and physical availability. A correctly sized system can still fail if water enters the enclosure, cables are damaged, ventilation is blocked or equipment is difficult to maintain.
Evaluate the complete installation, including:
- Panel frame and pole loading
- Enclosure sealing and cable glands
- Drainage and condensation management
- Corrosion exposure
- Dust and insect entry
- Equipment operating temperatures
- Earthing, bonding and surge protection
- Cable routing and mechanical protection
- Tamper resistance
- Safe access for technicians
- Separation of power and network cabling where required
Do not assume that the enclosure’s outdoor rating automatically applies to every installed connector, gland, vent or field modification. Drilling additional holes or using unsuitable cable entries can undermine the original protection.
Protect the system without obstructing it
Security measures should not shade the panel, block ventilation or make routine inspection impractical. Place enclosures and cables where they are less exposed to accidental impact or deliberate interference, while preserving technician access.
Panel mounting also needs to balance:
- Solar orientation
- Wind exposure
- Resistance to movement
- Cleaning access
- Cable protection
- Visibility and tamper risk
- Separation from camera views and wireless paths
For wireless camera sites, ensure that the panel or metal enclosure does not obstruct an antenna’s required path. Likewise, avoid mounting communications equipment where future panel movement or maintenance could change antenna alignment.
Create a practical maintenance plan
Maintenance frequency depends on the environment and site risk, so a universal interval is inappropriate. A useful inspection plan should cover:
- Panel cleanliness and physical damage
- New vegetation or structural shading
- Loose mounting hardware
- Cable wear and connector condition
- Water, dust or insect entry
- Battery and controller status
- Logged low-voltage or protection events
- Camera, network and recording operation
- Enclosure seals and cable glands
- Changes to the connected equipment
Remote status monitoring can reduce unnecessary site visits, but only if the required interface is included, configured and integrated into the management platform. An optional communications feature should not be treated as standard without checking the supplied configuration.
5. Compare lifecycle cost and expansion capacity
The lowest purchase price is not necessarily the lowest lifecycle cost. Compare the complete installed system, expected maintenance effort, replacement process and cost of downtime.
Include the cost and operational effect of:
- Panels, battery, controller and enclosure
- Poles, brackets and foundations
- PoE injectors, converters or switches
- Cabling, glands and protection equipment
- Installation labour and access equipment
- Commissioning and documentation
- Scheduled inspection and cleaning
- Battery or component replacement
- Fault-finding and travel to remote sites
- Monitoring integration
- Future cameras or network equipment
Integrated systems can reduce the number of separately sourced items, but a proprietary layout may limit later changes. Separately specified systems can make expansion easier, although additional engineering and compatibility management may increase the initial project cost.
Allow for expansion deliberately
Do not add vague “future-proofing” margins without defining what may change. Identify realistic expansion scenarios, such as:
- Adding a second camera
- Replacing a fixed camera with a higher-load model
- Adding infrared or white-light illumination
- Installing a wireless bridge
- Adding local recording or an edge device
- Extending cable distances
- Introducing remote monitoring
Then verify whether the proposed system has sufficient output ports, current capacity, battery reserve, panel input headroom and enclosure space. An unused DC output does not prove that enough energy or controller capacity is available for another device.
A useful procurement comparison should show the base load and each expansion scenario separately. This makes it easier to decide whether to buy spare capacity now, prepare the mounting and cabling for a later upgrade, or install a modular system.
Supplier selection checklist
A supplier should provide enough documented information for the installer or engineer to evaluate compatibility independently. Before ordering, ask for the current datasheet and confirm the supplied configuration rather than relying on a family name or nominal capacity.
Use this checklist:
- Load definition: Has every camera, radio, switch, converter and accessory been included?
- Electrical compatibility: Do voltage, current, polarity, connectors and PoE requirements match?
- Output limits: Are total and per-port limits documented?
- PV limits: Are the controller’s maximum panel voltage, current and power stated?
- Battery details: Are nominal capacity, chemistry, protection and permitted temperatures documented?
- Autonomy basis: Are runtime estimates linked to stated load and solar assumptions?
- Environmental suitability: Are enclosure, gland, mounting and temperature requirements clear?
- Protection design: Are isolation, overcurrent, surge, earthing and low-voltage protections addressed?
- Monitoring: Is remote communication standard, optional or unavailable in the supplied configuration?
- Installation scope: Are brackets, cables, connectors and conversion devices included or separately required?
- Maintenance access: Can the panel, enclosure, battery and controller be inspected safely?
- Expansion: Is spare port count supported by actual power and energy headroom?
- Documentation: Are wiring diagrams, commissioning settings and fault indicators available?
- Replacement planning: Can key components be identified and replaced without redesigning the site?
- Commercial terms: Have warranty scope, exclusions and support arrangements been confirmed directly?
Common mistakes include selecting by panel wattage alone, treating nominal battery capacity as usable energy, ignoring PoE conversion losses, surveying shade during only one season, and assuming a spare output can support another camera.
The practical next step is to document the site’s port count, continuous and peak load, cable distances, power interfaces, environmental exposure and management needs. Then compare those requirements with the linked Maxsol models, verifying the latest datasheet and supplied configuration before making a selection.